Can you have a video studio in the office, and what should the space look like?
Many organisations think they don’t have a suitable space for a video studio. In many cases, that’s simply not true. Even smaller or less obvious spaces can be turned into a professional studio, as long as you take a few key requirements into account.
In this article, you’ll find out exactly what a space needs to be suitable, which steps to follow and which mistakes are best avoided.
Many organisations would like their own studio but assume their office space isn’t suitable. They focus on limitations such as low ceilings or a small footprint rather than what is actually required. As a result, they miss opportunities to create a studio that works well in practice.
The result when you do it well is an accessible in-house video studio that makes it easy to record professional CEO messages, training sessions and webinars. Colleagues no longer need to arrange external venues, creating content becomes easier, and the quality of communication improves noticeably.
In this article, you’ll learn:
- Why you probably need more space than you think
- How to define realistic space requirements
- Which technical requirements really matter
- A step-by-step approach to implementation
- Common mistakes and how to avoid them
By the end, you’ll know exactly how to create a professional studio in your office, even if you currently think there’s no room for one.
Ceiling height: crucial for lighting
The height of your office space plays a major role in lighting quality. The lower the ceiling, the more compromises you’ll need to make on professional image quality.
“For a professional studio, a ceiling height of 3 metres is ideal. At 2.7 metres it’s just about manageable, but below that you’ll start compromising on quality.” Jacqueline Borremans Business Consultant AVEX
Key space requirements for an office studio
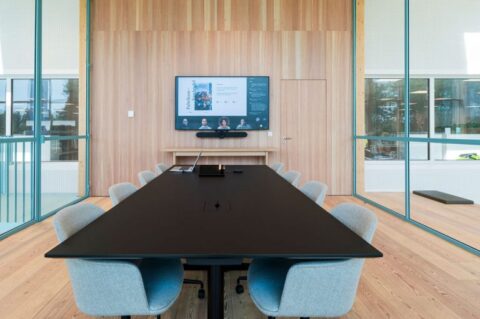
A good studio starts with the basics: the room itself. Dimensions, location and acoustics determine whether a professional setup is possible or not. These are the five most important requirements:
1. Dimensions and layout
2. Location within the office
3. Technical infrastructure
4. Acoustics and sound insulation
5. Flexibility and future-proofing
Key physical and technical requirements:
| Section | Directive | Further explanation |
| Ceiling height | Ideally 3.0m (minimum 2.7m) | Allows sufficient room for lighting, microphones and camera angles. |
| Sound environment | Quiet surroundings with minimal background noise | Studios are sensitive to HVAC noise, echoes and vibrations. |
| Lighting control | Adjustable artificial lighting, preferably with limited daylight | Ensures consistent image quality and colour temperature. |
| Background depth | At least 1.5 to 2 metres behind the presenter | Prevents shadows and creates visual depth. |
| Room size | Depending on the setup, approximately 12 to 20 m² | Flexible, provided there is enough space for camera positions and movement around the room. |
Checklist: from choosing a room to launching your studio
Creating a studio is a step-by-step process. The approach below helps you move from initial idea to launch in a structured way.
Step 1: Space audit
Start with an objective assessment of the available spaces. Look not only at dimensions, but also at location and acoustics.
Step 2: Technical assessment
A technical specialist should review whether the space meets the requirements for power, networking and ventilation. This helps prevent costly surprises during installation.
Step 3: Functional requirements
The studio should match how your organisation plans to use it. Defining use cases in advance makes it much easier to design the right setup.
Step 4: Budget & planning
A realistic budget and a clear project plan help ensure delivery stays predictable and within expectations.
Step 5: Implementation with minimal disruption
During installation, you’ll want to minimise disruption to colleagues. Good communication and careful planning make this possible.
Common mistakes and how to avoid them
Even with a solid plan, a few crucial mistakes regularly appear. These are the ones I encounter most often, and how to avoid them:
- Focusing only on floor space → Ceiling height and room shape are often more important.
- Underestimating technical requirements → Always carry out a technical assessment.
- Involving users too late → Make usability a priority from day one.
- Skipping scenario planning → Test at least three usage scenarios before finalising the design.
Practical implementation checklist
Want to make sure nothing gets overlooked? Use this checklist to keep track of each phase of the project.
Phase 1: Preparation
☑ Carry out a space audit
☑ Schedule a technical assessment
☑ Secure budget approval
☑ Assemble the project team
☑ Involve end users from the beginning
Phase 2: Implementation
☑ Complete any required room modifications
☑ Install AV equipment
☑ Add furniture and studio fittings
☑ Thoroughly test the system
☑ Train users
Phase 3: Evaluation
☑ Plan a soft launch
☑ Gather feedback from the first users
☑ Organise the official opening
☑ Schedule a review after three months

Jacqueline Borremans
Business Consultant

Publication date
12 September 2025
Updated date
25 August 2026
Sector
All Sectors, Central Government, Culture, Sports & Recreation, Education, Financial & Professional Services, Government, Healthcare, Hospitality, Local Government, Public Safety & Security, Retail, Trade & Industry
Solution
In-House Studios
Keep discovering